Setting up e-invoicing in the Coupa Supplier Portal is a crucial step for efficient and compliant invoicing. This guide will walk you through the process of setting up your legal entity and configuring your e-invoicing details.
Accessing the Admin Page
- Log in to your Coupa Supplier Portal account.
- Click on the “Admin” tab at the top of the page.
- The admin page will display, giving you access to various configuration options.

Setting Up Your Legal Entity
Initiate Legal Entity Setup
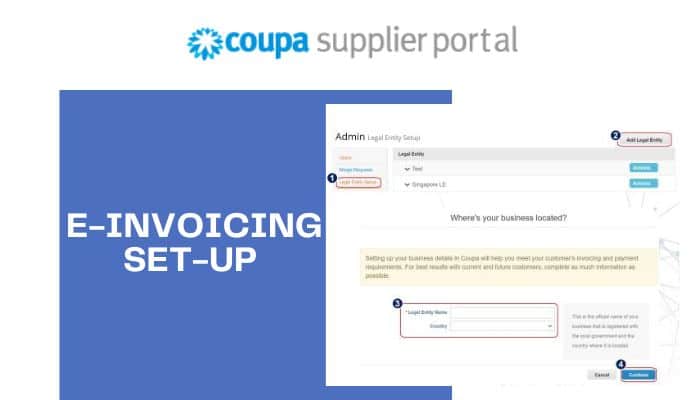
- On the admin page, locate and click the “Legal Entity Setup” link.
- Click on “Add a Legal Entity” to begin the process.
Enter Basic Legal Entity Information
- Provide your Legal Entity Name: Register your business’s official name with your local government.
- Select the Country where your company is located.
- Click “Continue” to proceed.
Provide Detailed Company Information
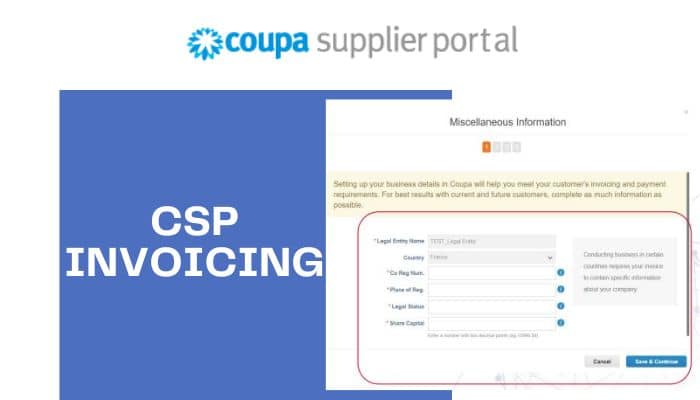
The system will request additional information based on your country of registration. For example, if your company is registered in France, you’ll need to provide:
- Co Reg Num: Enter your company’s registration number from the commercial register.
- Place of Reg: Specify where the company is registered.
- Share Capital: Enter the registered share capital of your company.
- Legal Status: Include the type of company as it’s legally registered.
Note: The required information may vary depending on your country of registration. Ensure you fill in all mandatory fields.
Configuring Invoicing Information
After entering your legal entity details, you’ll need to set up your invoicing information.

Customer Assignment
- Decide which customers can see your legal entity and use it on compliant invoices.
- You can choose to assign all customers or select specific ones.
Invoice From Address
- Provide your company’s Invoice From the address.
- Ensure all mandatory address lines are completed.
Address Usage Options
You’ll see checkboxes for different address usages. Configure these based on your company’s needs:
- Use this address for Remit-To: Uncheck if your Remit-To address differs from your legal entity address. Also, uncheck if your company has multiple Remit-To addresses.
- Use this for Ship From address: Uncheck if it’s different or if your company has multiple shipping locations.
Step 4: Additional Addresses (if applicable)
If you unchecked any boxes in the previous step, you’ll need to provide the relevant addresses:
- Remit-To Address: Provide the complete address. Ensure all mandatory fields are filled. If using cXML invoice transmission, provide a Remit-To Code.
- Ship From Address: Enter the complete address. Fill in all required fields. For cXML invoice transmission, provide a Ship From Code.
Tax and Miscellaneous Information
Tax Details
- Select your tax country.
- Provide your VAT ID.
- If VAT ID is not available, check the box to provide a local tax number or local registration number for tax purposes.
- Click to include multiple TAX IDs if necessary.
Miscellaneous Data
This step is primarily for cXML invoice transmission:
- Invoice From Code: This code ties your CSP Invoice From the address with the corresponding address in your cXML Invoice. It will appear in the cXML as an AddressID.
- Select your preferred language.
- Click “Save and Continue” to proceed.
Payment Information
When creating a legal entity, you’ll see a “Where do you want to receive payment” window. You have three options:
- Address (default option): If selected, you can proceed to the next step as you’ve already provided the address(es) earlier.
- Bank Account: Choose this to provide your banking information for inclusion on your invoices. Note: For German companies, this information is required.
- Virtual Card: If selected, provide an email address. Indicate whether you accept credit cards.
Important: Banking information is required for compliant invoicing when indicated with a red asterisk. If it’s not mandatory, Airbus likely already has this information within your contract.
Completion
Once you’ve completed all the steps, you’ll see a “Setup Complete” page. This confirms that you’ve successfully set up your e-invoicing capabilities in the Coupa Supplier Portal.
Remember, proper setup of your e-invoicing details ensures smooth transactions and compliance with various regulations. If you encounter any issues during this process, don’t hesitate to reach out to Coupa support at supplier@coupa.com.